User and Project Permissions
This user guide only applies if your account and project is on our new platform, i.e. if your project's URL begins
with https://<your-account>.xp-dev.com rather than https://xp-dev.com. If your account is on our old platform,
you should be using this user guide instead.
Users
Managing Users
On XP-Dev.com, each user that you create is unique to your main account. For example, the user bob on
https://company-abc.xp-dev.com is entirely different from user bob on https://company-xyz.xp-dev.com
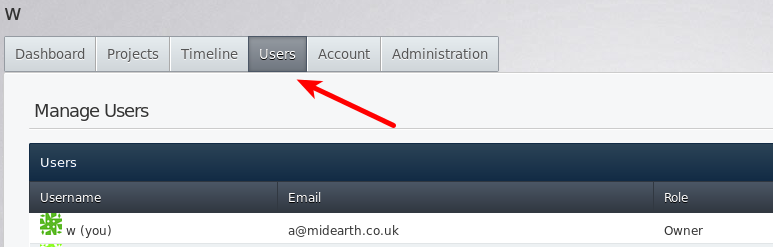
To manage users, you will need to be an account Owner, and is managed through your account's Users tab:
Creating Users
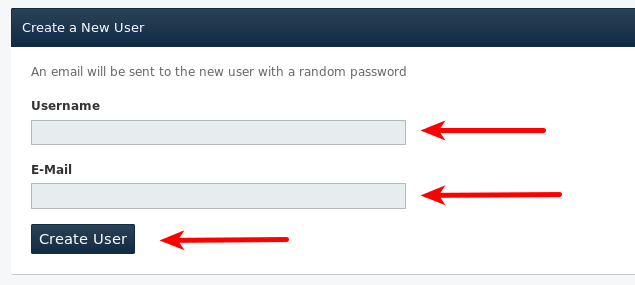
- Head to your account's Users tab
- Fill in the Username and Email fields in the form under Create a New User
- Click on Create User
- An email will be sent to that email address with login details for the newly created user
User Roles
There are three types of users that you can choose. When a new user is created, they are assigned the User role.
- User: these are regular users in your account, and will need to be explicitly permissioned on each project
- Administrator: users with this role can:
- Create, administer & delete projects and repositories
- Assign and revoke permissions to/from users on projects under the main account
- Access all projects under the main account as a project administrator
- Owner: users with this role have all access as an account Administrator, and additionally:
- Create, edit, manage and delete users under the main account
- Access the main account's payment settings to make payment on orders, and view previous payments
including invoices and receipts
- Administer settings for the main account
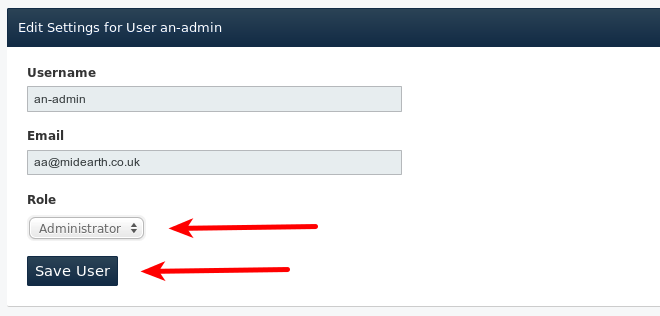
Changing User Roles
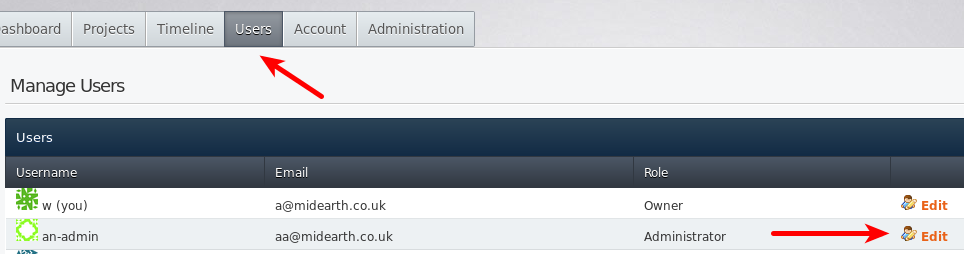
- Head to your account's Users tab
- Click on the Edit link for the user you'd like to change their role for
- Change the drop down options under Role to either User, Administrator or Owner
- Click on Save User
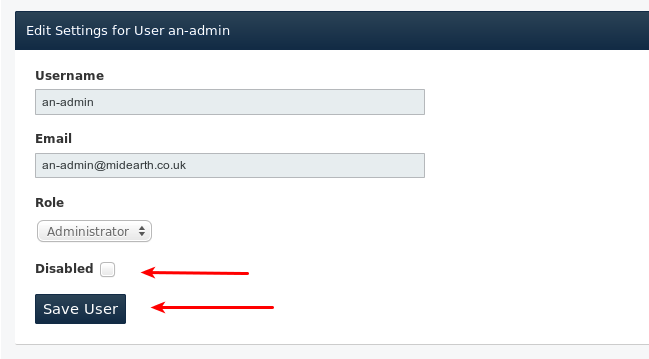
Disabling Users
Disabled users won't be able to access any of your projects or repositories and additionally are blocked
from logging into their account.
- Head to your account's Users tab
- Click on the Edit link for the user you'd like to disable
- Check the box next to Disabled
- Click on Save User
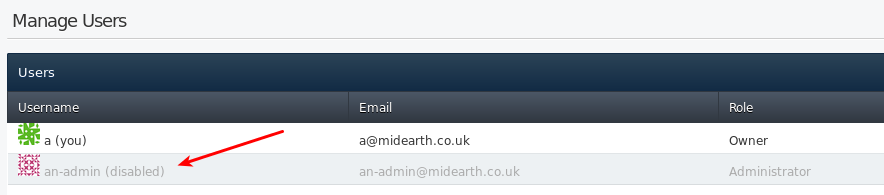
- Disabled users are greyed out on the main users page:
Project Permissions
Note: Project permissions can only be altered by account owners/administrators or project admins.
Permission Types
Repository permissions are inherited from their parent project (except for Project Tracking Readers and Project Tracking Writers).
For e.g. a project writer will have write access to any repositories under the project.
There are a number of different permission types that can be assigned to
users:
- Admins: Project administrators have access to create/delete
repositories as well as administer them with respect to configuring
them to integrate with various external tools like
Twitter, Basecamp,
FogBugz, etc. Additionally, project administrators
can amend project permissions (add/remove users) as well.
- Writers: Writers are users who can make and commit changes to
the project (including repositories), and they are not allowed to
perform any of the adminstrative tasks like administering
repositories or permissions.
- Readers: Readers are users who only have read-only access to the
project (including repositories) and can't make or commit any
changes.
- Project Tracking Writers: Project Tracking Writers are users who
can make and commit changes to the project (excluding repositories).
They are not allowed to perform any of the administrative tasks or
access to repositories.
- Project Tracking Readers: Project Tracking Readers are users who
have read-only access to the project (excluding repositories).
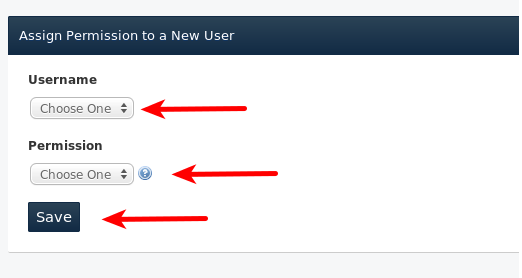
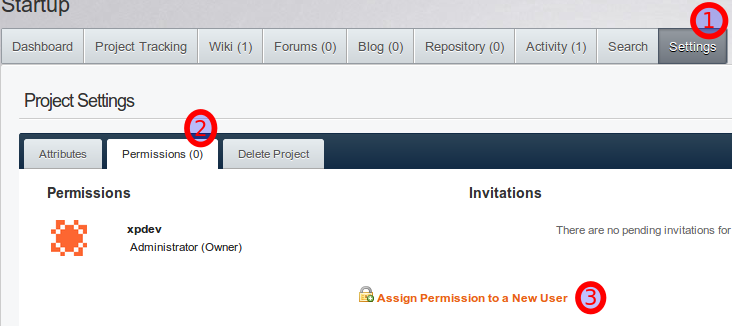
Adding Users to a Project
Select the project's Settings tab and then the Permissions tab.
Click on the link at the bottom of the page called Assign Permission
to a New User:
Removing Users from a Project
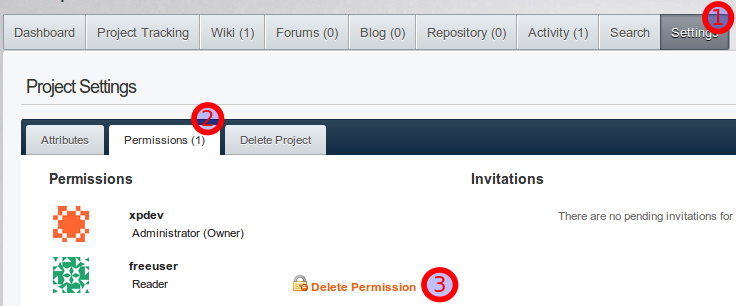
- Select the project Settings tab and then the Permissions
tab. Click on the link called Delete Permission for the user
that you want to remove from your project and confirm the deletion:
Feel free to contact us if you need any
assistance.